Image & Photo Guidelines
File Types and Requirements:
Your images should be saved as a .png or .jpg All files must be under 5mb with a minimum resolution of 72ppi.

Shop Banners:
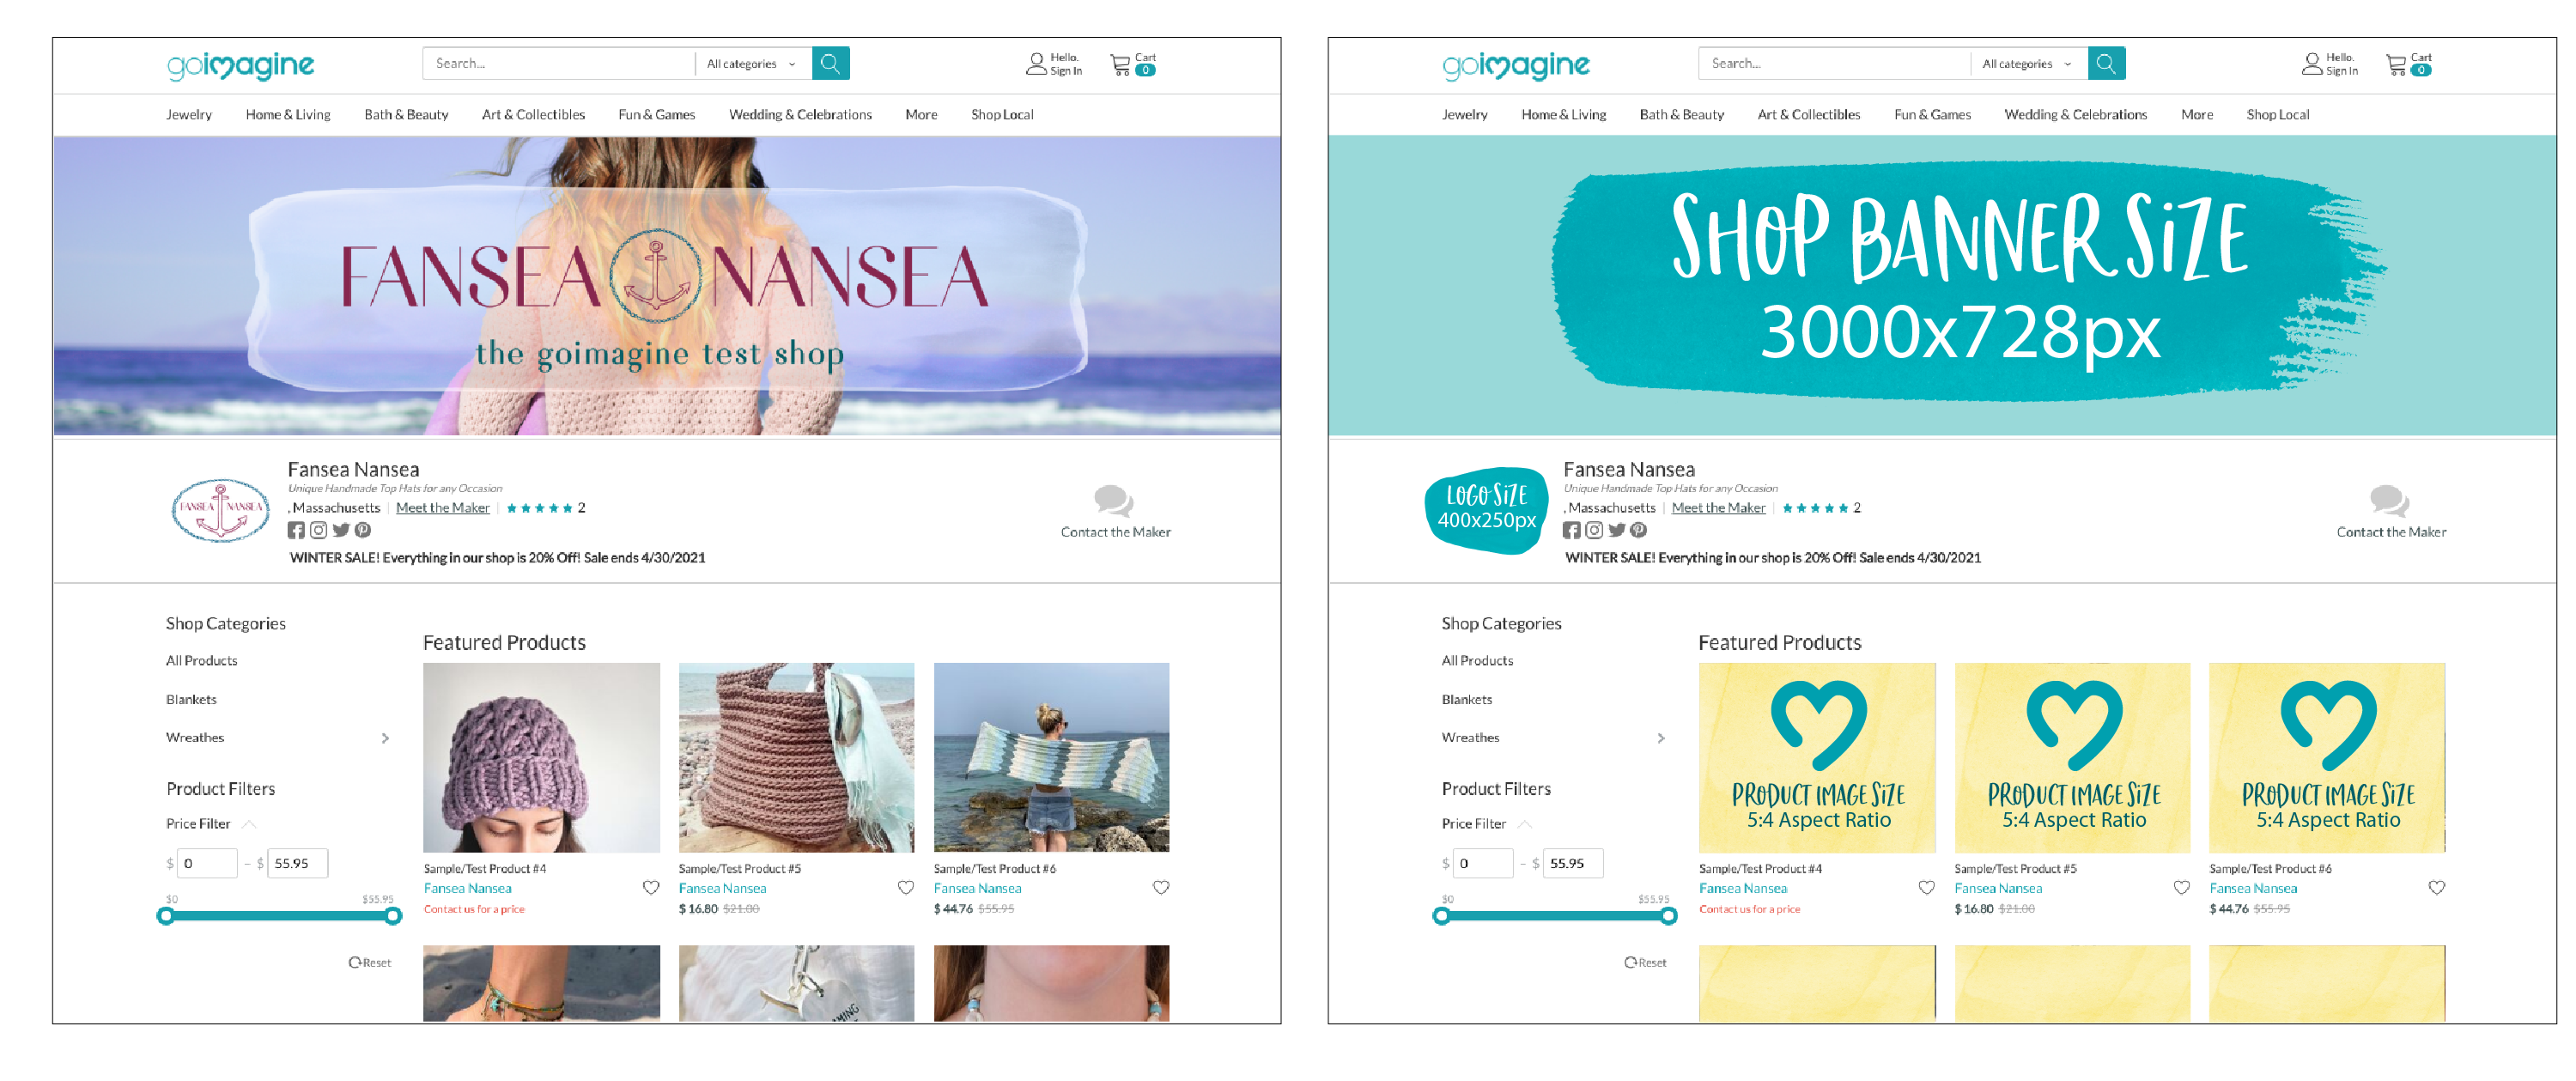
Your shop banner will be the first thing a customer sees when visiting your shop directly. It is often the first impression of a customer. The recommended shop banner size is 3000x728 pixels. The banner is set to auto size the width so it will look nice across multiple screen sizes. For your convenience, we have setup a Canva template with our recommended size. You can access it here.
Logo Image:
The area designated for your logo is located in your shop description bar found directly below your shop banner. The image uploaded also appears on the “more info” page as well. You can upload this image into the "logo for customer area". The recommended image size is 400x250 pixels.
This section can be used in 2 ways.
- Use the logo image area for your shop logo. This is the most common. You can then use the description text area to give more details about your company and any other information you’d like customers to know. We recommend putting your logo on a clean white background for best visual appearance.
- Use the logo image area for a personal picture. Some sellers find that connecting to their customers on a more personal level helps with their business. You can use the description text area to describe a little about you- the seller.
Invoice Logo:
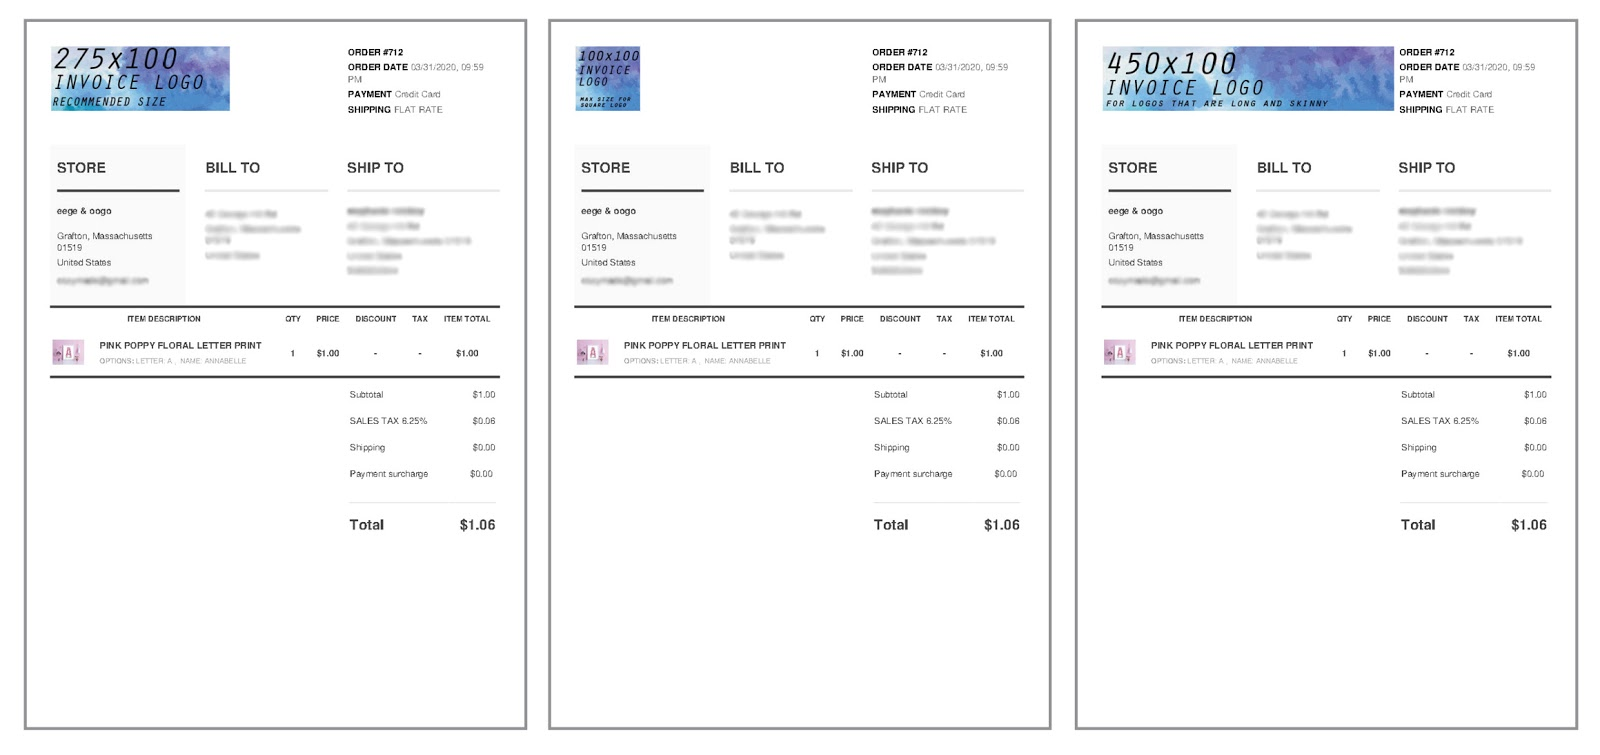
This logo will be used on your invoices. A copy of your invoice will be emailed to anyone who makes a purchase. You can also print your invoices to include when you ship your product. Our system DOES NOT resize this image for you. Therefore sizes below are very important to follow so your image does not compromise the look of your invoice.
The maximum height of your image should be no larger than 100 pixels.
Recommended image size is 275x100 pixels. This size is good for ALL logo types, however if your logo is square or very long you may want to consider the below:
- Square - your image size should be 100x100 pixels.
- Long - your image size should be no larger than 450x100 pixels.
Product Images:
Product images are set to a 5:4 Aspect Ratio. The minimum recommended product image size is 1000x800 pixels. This is to ensure your images look good both in search and when a customer zooms in. Your first image should be horizontal for best appearance in search. Here are a few things to remember when taking your product images.
Product Image Tips:
If you have great product images, you’re more likely to grab a buyers attention. Here are a few tips to remember when photographing your products:
- Use as many images needed to show your product in the best way.
- Show your product in use. This may mean being held or worn depending on your product. If it helps, include a common item with your product to help buyers know the scale of the item.
- Make sure to also show your product on a clean de-cluttered background. White is usually best.
- Add shots of product detail to help customers see your craft up close.
- Try to keep the product in your 1st image centered. If you plan to offer free shipping, please note the placement of the "free shipping" flag so it does not cover any important portions of your image.
- Try to use natural light when possible. Shooting images in daylight is best, limit the use of a camera flash as it can sometimes wash out your product.
Help! My Images won't upload!
Sometimes the images you are uploading might be too big. Not in dimensions (pixels) but in size (megabytes). Luckily, there is a super easy and FREE fix for this. Simply run your images through tinyPNG to compress them. This will make them smaller without losing much image quality.
Meet the Maker:
This is the perfect space to share your story and introduce yourself to your customers. Images for this area look best at 500 pixels wide or smaller. If you would like to use multiple images for this area (for example there are more than one maker in your shop), we suggest using a photo grid/collage to combine the photos you would like to use and upload as one image. Keep in mind that the height is flexible, so portrait or square size images usually work best.
How it's Made:
Within each product, you have the ability to include a description and photo of the work in progress. These image areas are constrained and are the same aspect ratio as the product images, 5:4. The same minimum pixels of 1000x800 should be used for this area as well. Images will appear in a column to the right of the text. If no text is included, the pictures will be centered in this space.
------------------------------------------------------------------------------------------
More FREE Resources:
The following list of resources might be useful when working on images for your shop. Goimagine is in no way affiliated with any of the companies listed below. We just have found them useful from one time to another.
Adobe Express - This is an excellent free tool to design logos & banners as well as editing images. It is free to use, but you will need to upgrade to a premium account for some features. Available on desktop and mobile devices.
Photogrid - This is an excellent tool for creating a collage or grid of multiple pictures. Free and paid versions available and can be be used on desktop as well as mobile devices. DESKTOP ANDROID APPLE
PicResize - Quick and easy (and free) way to resize your images based on Pixels or Percentage.
TinyPNG.com - This is an excellent tool for compressing images that may be over our 2mb upload limit. Easy to use, and free.
Photo Layers App - Mobile only but is available for both android and apple. This is a great tool for putting a frame or overlay on photos. Works great for social media posts. ANDROID APPLE
Snapseed App - Mobile only but is available for both android and apple. This app is simple to use and give you stunning results for cleaning up images. ANDROID APPLE


